Students’ BYO devices (PC, Mac and iPad) must be enrolled into the School network using the procedures listed below. Through the installation of a small piece of software the School will be able to deploy settings and applications automatically or on-demand to students, including:
- Access to the School printing system
- School email settings
- School timetable/calendars (for supported devices)
- School-licensed software (such as the Adobe Creative and Microsoft Office suites)
Note: A maximum of 2 devices per student is allowed for the Senior School BYOD program
Please select the tab below, applicable to your device, and follow the instructions to enrol your BYO device.
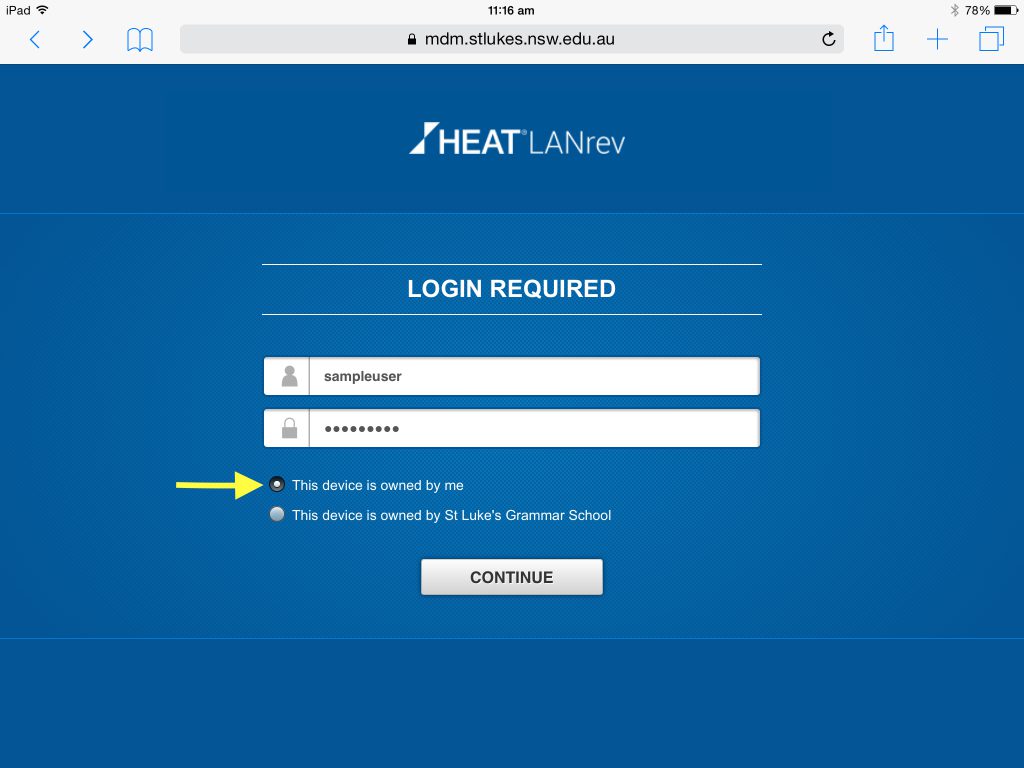
- Open Safari and browse to http://mdm.stlukes.nsw.edu.au/
- Log in with your School username and password – *Ensure that “This device is owned by me” is selected
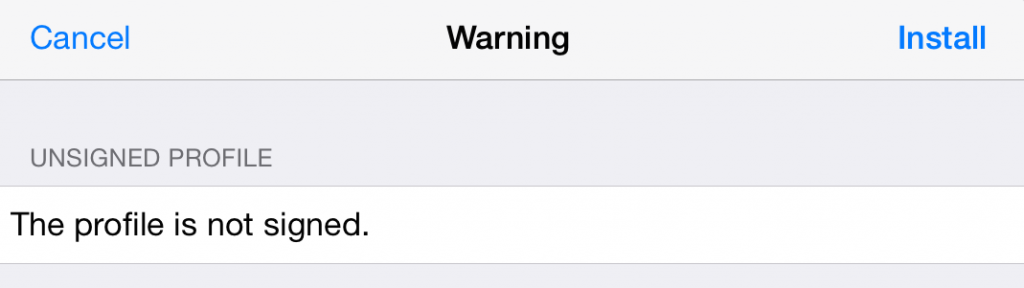
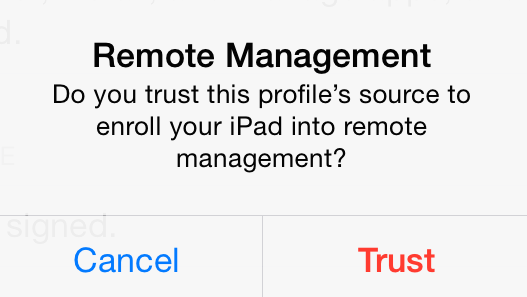
- After selecting “Continue”, you will be redirected to the Settings app to install a profile. Select “Install”

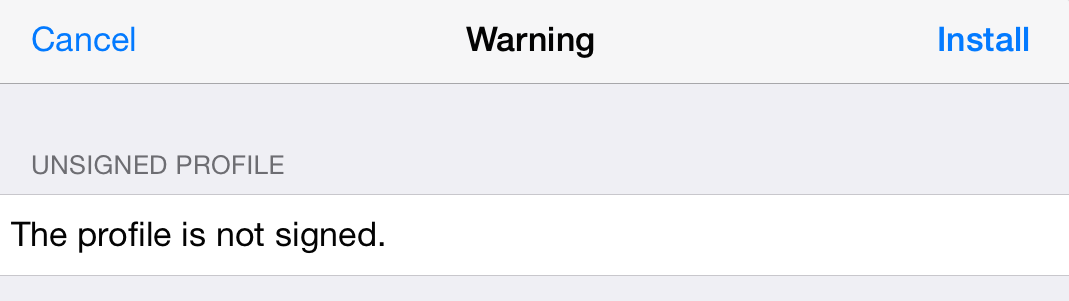
- Follow the prompts by selecting “Install” on the next few popups:
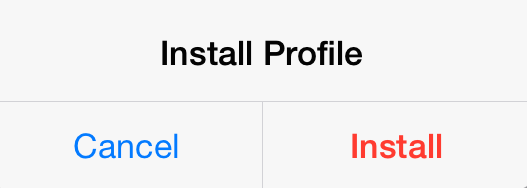
- Lastly, select “Done” to return to Safari.

Within a few seconds, various settings, such as Email, Wireless and Calendars will appear on your iPad.
NOTE: It is highly recommended to restart your laptop after running the installation!
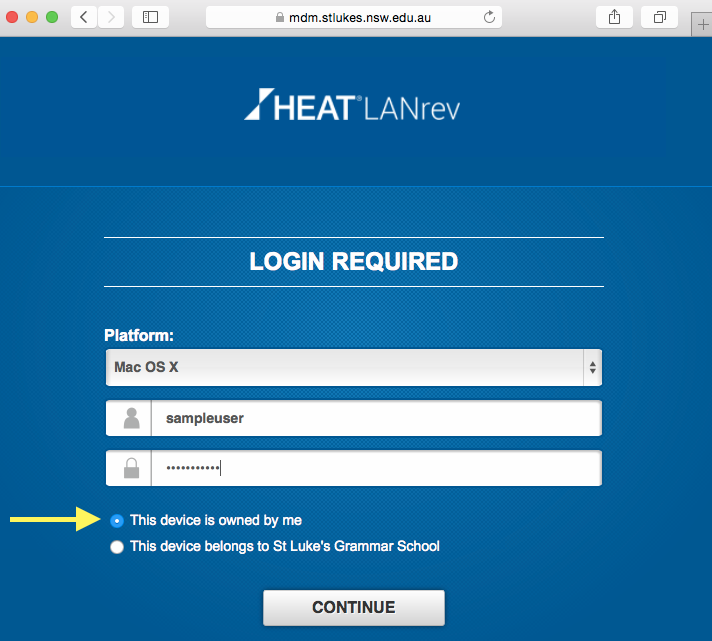
- Open Safari and browse to http://mdm.stlukes.nsw.edu.au/
- Log in with your School username and password – *Ensure that “This device is owned by me” is selected
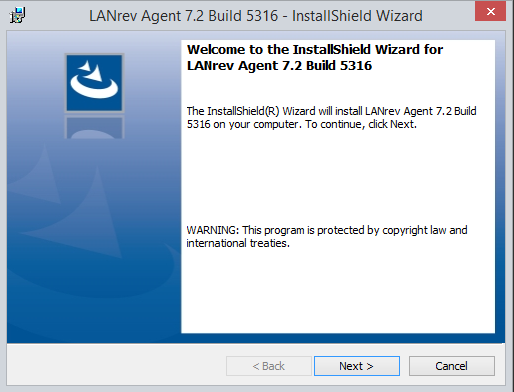
- After selecting “Continue”, an installer package will begin to download. Click the “LANrev Agent”.
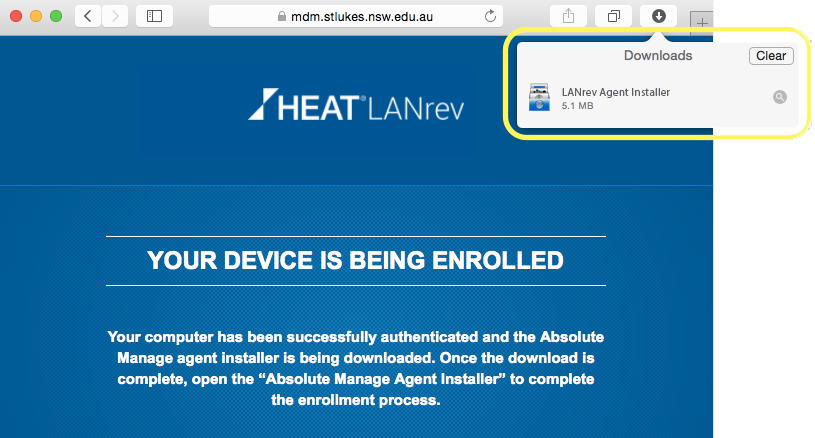
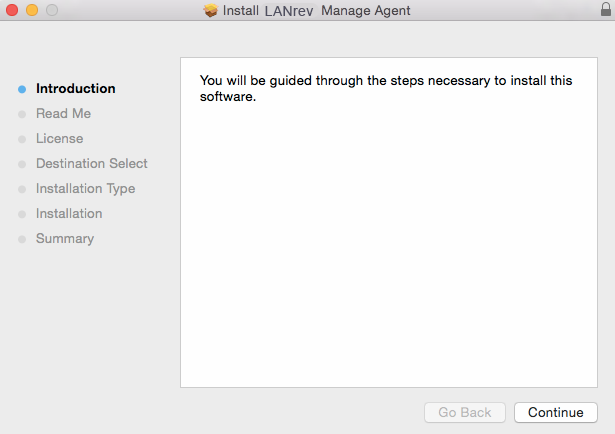
- Follow the steps of the installer to complete the enrolment process.
NOTE: It is highly recommended to restart your laptop after running the installation!
- Open a web browser such as Mozilla Firefox, and browse to http://mdm.stlukes.nsw.edu.au/
- Log in with your School username and password – *Ensure that “This device is owned by me” is selected
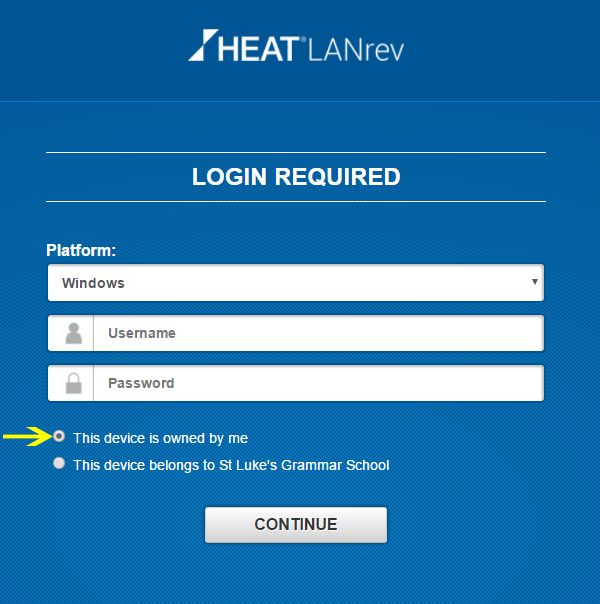
- After you select “Continue”, a zip file will begin to download. Save the zip file to your computer
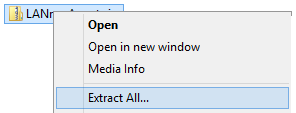
- After the file has been saved, extract the zip file by right clicking on the zip folder and selecting “Extract All…”:
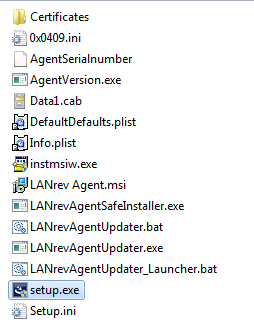
- Launch the “setup.exe” file:
- Follow the Setup prompts to complete the enrolment: